A steel front door must be properly installed to ensure that your home is both well protected and energy-efficient. Featuring steel interior frames reinforced with extruded aluminum, GIT steel doors deliver outstanding durability and heightened security compared to all other types of doors on the market.
This guide will take you through all the steps required for installation, to help you complete this task simply and effectively.
Step 1: Inspect the door
Inspection
Following delivery and before beginning installation, take the time to carefully inspect your new steel door. Make sure no damage, such as dents, scratches or deformations, has occurred during shipping and handling. To ensure a successful, durable installation, an intact door is essential.
Step 2: Prepare the opening
Frame the opening
The dimensions of the opening must be one inch wider on either side and one inch higher than those of the door. That extra space will allow you to add insulation and optimize adjustments.
With a tape measure, calculate the height and width of the opening in several places. This way, you can check that the opening is uniform, with no major variations that could lead to problems during installation.
Clean the opening
Next, it’s very important to clean the rough opening: remove all debris, dust and residue that could prevent a proper fit and installation. A clean, dry opening will help ensure that the door fits perfectly and operates properly.
Step 3: Prepare the door
Add shims
Before fitting the steel door into the opening, you’ll need to support it by inserting shims. Position shims at the bottom and on each side of the frame to keep the door in place during installation. The shims will also create the necessary space to add insulation around the door.
Make sure the shims are correctly positioned and sturdy enough to support the weight of the door without anyone needing to hold it in place. This will make it easier to level the door and ensure a stable, secure installation.
Step 4: Install the door
Fit the door into the opening
With preparation now complete, it’s time to fit the steel door into the opening. Centre the door so that it will not move during installation. Make sure the door is plumb (vertical) and perfectly centred in the opening.
Use a bubble level to check that the door is perfectly level (horizontal) and plumb (vertical). This adjustment will help ensure that the door operates properly for a long time. Adjust the bottom shims until the door is perfectly level.
Once the door is set (properly positioned), secure the frame in place using three screws on each side. (Important: never screw the frame into the door head or sill.) Next, tighten the screws so that the door hangs firmly in place but any necessary adjustments are still possible.
Step 5: Fasten and adjust
Seal sidelights/transom
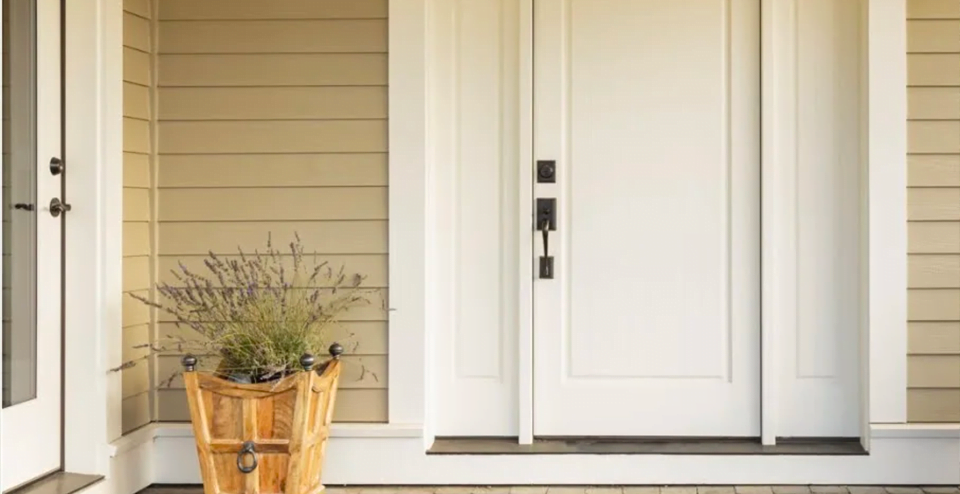
If your steel door includes sidelights or a transom, these need to be properly secured. Apply silicone sealant between the glass and frame: this will prevent air and water infiltration while holding the sidelight/transom firmly in place. Make sure to apply a uniform bead of sealant for optimum air and water tightness.
Reinforce around the handle
Strengthen the area around the door handle and lock by using shims. Place shims close to where the handle is to ensure greater stability and keep the door from moving over time. This will help ensure the door operates smoothly and securely.
Solidify the top hinge
The topmost hinge has to support a lot of the door’s weight, especially if it is heavy (e.g., because of a glass insert). Replace one of the supplied screws with a four-inch screw ensure that this hinge is firmly attached: this will help the door remain in place and keep it from sagging over time.
Insulate
Adding enough insulation is essential to ensure optimum energy efficiency and airtightness. Fill the gaps between the door frame and the opening with expansion foam (take care not to overfill, as this could warp the frame). Once the foam is dry, trim off any excess with a utility knife to leave a flat surface.
Step 6: Complete the outdoor finishing
Install the flashing
To complete the installation of your steel door, it’s very important to install flashing around it. This finish covering, usually made of folded aluminum, provides extra protection against the elements and improves the aesthetics of the door.
Position flashing all around the outdoor frame, making sure it completely covers the edges to prevent water and air infiltration. Once the flashing is in place, secure it using finishing nails. Use nails in all four corners to firmly secure the flashing, making sure the nailheads are discreet and don’t detract from the esthetics.
This exterior finishing will not only provide better protection for your door, but also ensure a polished, professional look.
Why you should choose the experts at GIT to install your steel front door
Installing a front door may seem like a simple process, but it often involves intricacies that require an expert’s eye. That’s why we highly recommend entrusting the job of installing your steel front door to our team. The benefits are many and clear:
- Certified expertise: GIT installers are certified professionals who know all the ins and outs of the products they install. This guarantees a flawless installation that will last.
- Precision adaptation: Every door demands a customized approach, especially in the case of complex renovations. The experts at GIT will assess and adapt the project to ensure the best possible installation.
- 10-year warranty: GIT steel doors come with a 10-year warranty from the date of manufacture on hardware and manufacturing defects. This warranty covers major deformations such as subsidence, swelling, twisting and perforation due to corrosion. GIT also offers a 10-year warranty on insulation applied during installation and on interior and exterior finishing of its doors and windows, except for exterior sealant joints. Paint is also warrantied for 10 years.
Here is the 6-step installation process by our experts:
- Measurements: A GIT technician takes care of measuring the door(s) you plan to replace.
- Delivery: Your new door(s) is(are) delivered to your home on the specified date.
- Removal of existing doors: Our installers carefully remove your old door(s) and ensure their proper disposal.
- New door installation: The team installs your new door(s), ensuring perfect positioning and optimal insulation.
- Finishing: Our installers pay particular attention to fit and finish, both exterior and interior, following your specifications for flawless results.
- Clean-up: After installation, our team cleans up the site, leaving it as tidy as when they arrived and ensuring your comfort.
Preparing the site for installation by GIT
To help the work go smoothly, here are a few tips for preparing the site before our installers arrive.
- Remove vehicles from your driveway.
- Move furniture and accessories that are near the work area, like blinds, curtains, rugs, carpets, framed art, decorative objects and so on.
- Make sure there is at least 4 feet of clearance in front of the door(s) to be replaced.
- If need be, clear snow to ensure a pathway to your door(s), including basement openings if necessary.
- Remove any air conditioner units from doors to be replaced.
- Remove any security bars/grates covering doors to be replaced.
- If you have a pet that could run away, have someone watch it, or make sure to keep an eye on it at all times.
- If need be, clear snow from paths, driveways and balconies.
- Give our installers a number where they can reach you any time, if you can’t be home during the work.
Note
You are responsible for contacting your municipality to obtain parking, sidewalk closure or alleyway closure permits, depending on the nature of the work. If the installation requires work at height using special tools, please inform your municipality of this as well, to comply with their requirements.
You must make sure the work site is safely laid out so that we can deliver and install the door(s). Ensure that there will be parking spaces available over a length of 65 feet in front of your property.
If need be, we can lend you “no parking” signs. If you aren’t able to use your personal vehicles to block off parking spaces for us, please e-mail your request to us at installation@git.ca.
Installing a steel front door: last word
If you’re an experienced DIYer, installing a steel front door can be a manageable project—as long as you follow the steps to the letter to ensure long-lasting results and trouble-free operation.
From roughing the opening to setting the door and frame, making adjustments and applying the exterior finishing, each step is crucial.
But if you’d rather avoid any potential hassles and be sure of a flawless installation, we strongly recommend calling on a certified GIT installer. Our experts have the necessary experience and skills to install your steel front door efficiently and safety—and the peace of mind you’ll enjoy in return will be as strong as one of our doors!
Feel free to ask for a free estimate for your door installation or to contact us with any questions!


